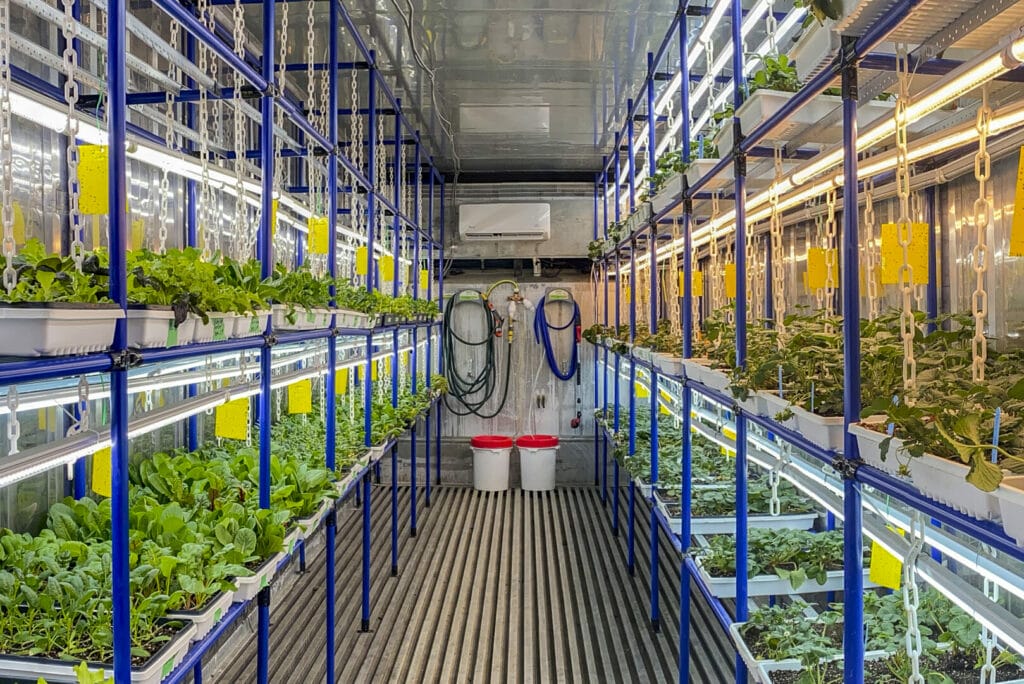
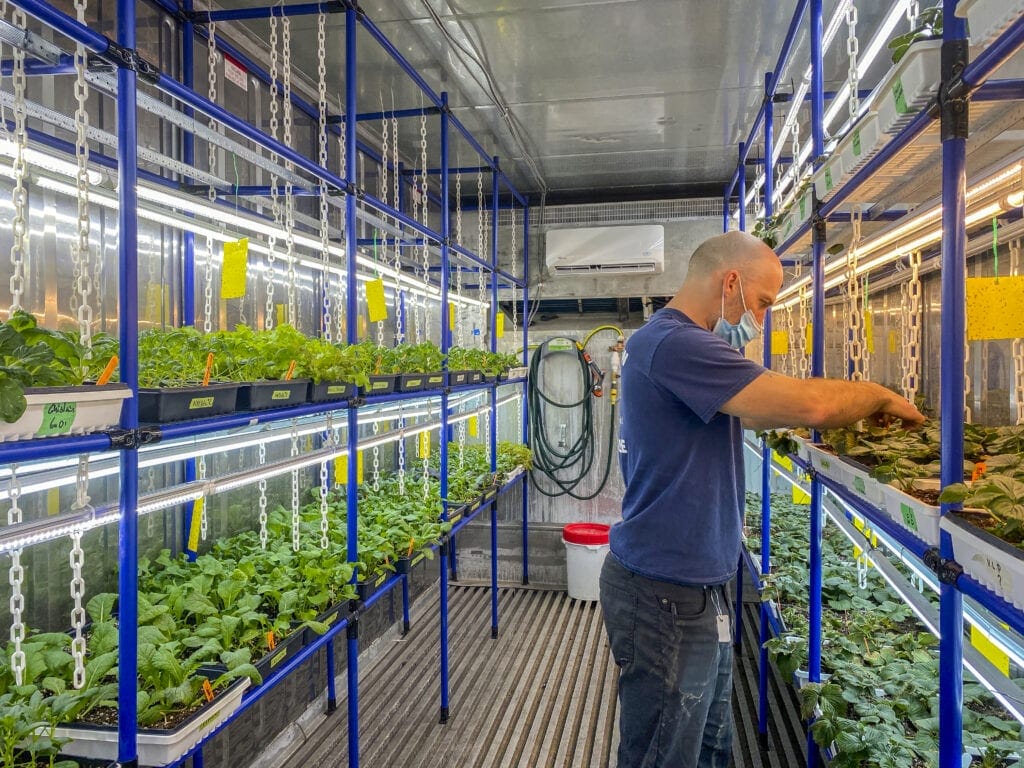
Have you ever thought about growing your plants in a recycled shipping container? If you find this idea silly, get ready to be blown away: this new farming method is as astonishing as it is fascinating! The CRIFA, a professional school located in Coaticook, Canada is currently experimenting with this type of innovative agriculture as part of an educational project. Here’s a story about them and how they built a DIY planter for container farming!
In 2020, Rémi Boucher and Renaud-Pierre Boucher, two teachers in the CRIFA’s plant production program, had the original idea to introduce their students to this innovative trend. They found an insulated container with an interior finish in food-grade stainless steel and embarked on this unique adventure!
Container Farming, What’s Up With That?
Determined to maximize the potential of this new approach to agriculture, the group of students and teachers did a lot of research first, in order to deepen their knowledge on the subject.
They succeeded, thanks to a lot of ingenuity and adapted technological means, to set up a completely autonomous container, equipped with a lighting system, air conditioning, humidity regulation and sophisticated air circulation in order to optimize production!

DIY planter for container farming 

container farming
Custom-made Industrial Planters for Cultivation
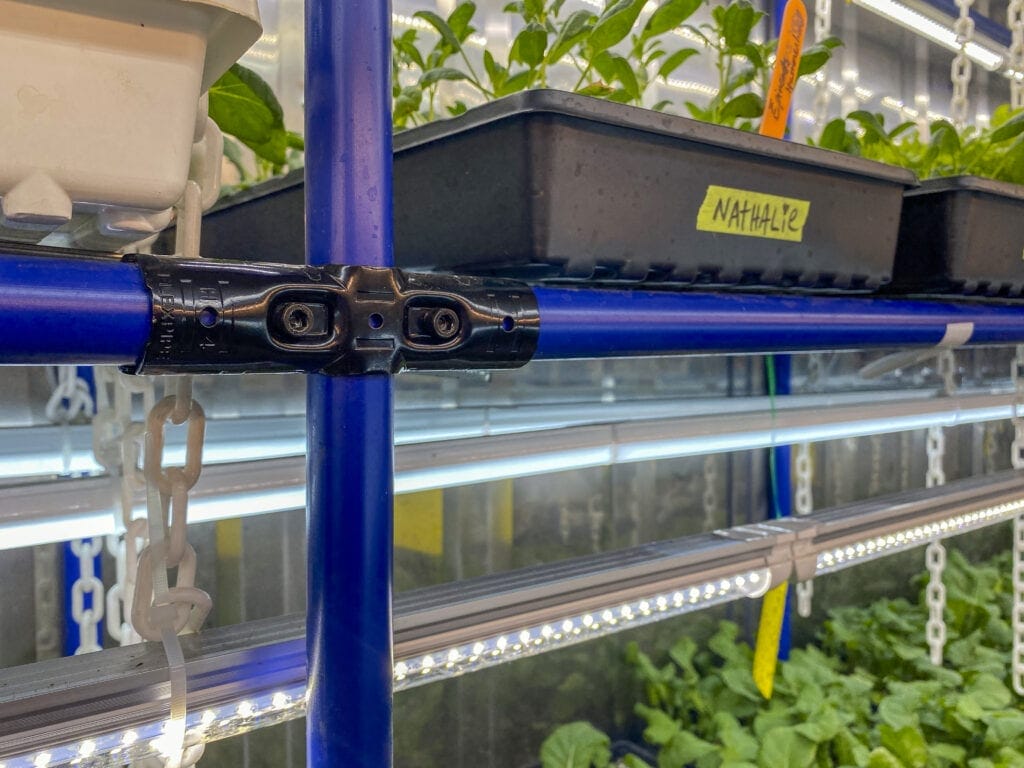
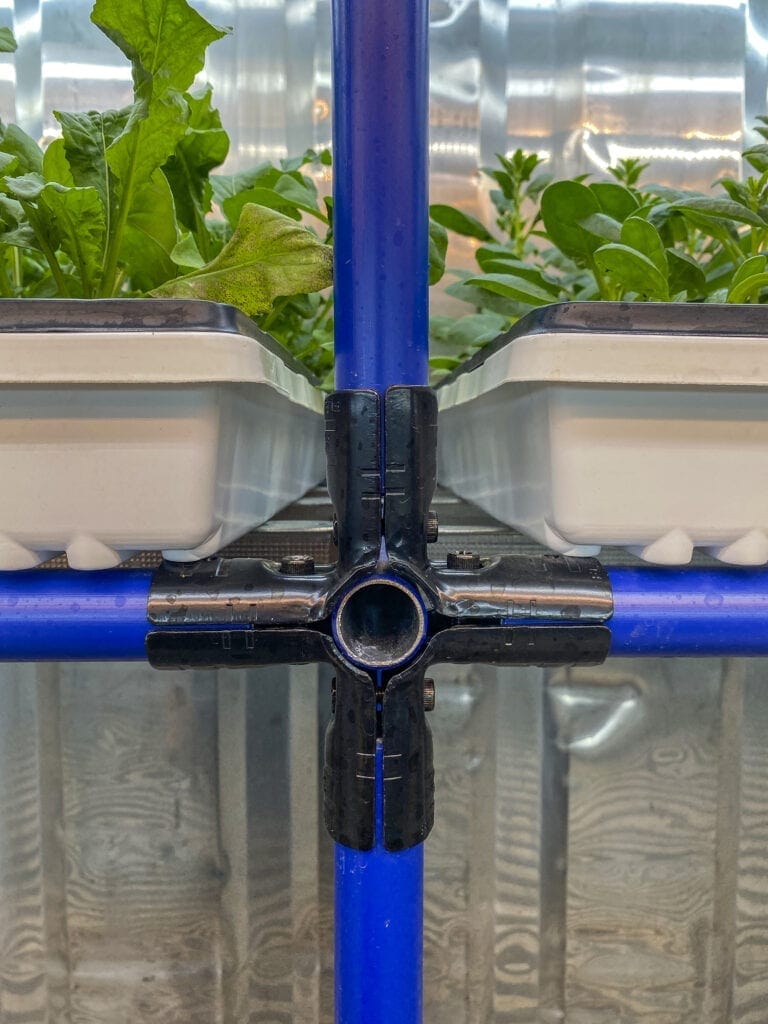
The CRIFA group’s interest in tinktube’s modular building material arose during their search for the perfect system to build their planters. They were looking for a product that would adapt as much to the dimensions of the container as to the specifics of production.
The issues that preoccupied Renaud-Pierre and his troupe:
The planter had to be durable and resistant to pesticides
Premature degradation was a risk, given the use of corrosive organic pesticides and the hostile environment in which the planter would be used -humidity could reach 65% and 90%, depending on the type of crop ? !
The construction had to be minimalistic
To avoid loss of light for the plants, the structure had to take up as little space a possible. It also had to be as light as possible, considering the container was going to be moved around geographically.
The system had to be flexible
Because of the evolving needs of the production, the planter had to be adapted easily through time. They made sure to build an adaptable DIY planter for container farming.
The structure had to be attached directly to the walls of the container
Since the container was going to be moved geographically, the structure had to be secured to the walls of the container to avoid accidents.
It had to be simple and easy to use
Since the planter was built in the context of a learning program, the structure was going to be assembled by the students, who were not familiar with modular systems.
The structure had to be sturdy
The system had to be robust enough to withstand a heavy load, which would vary a lot depending on the watering times. The team had to make sure the planter could support all the plants’ bins, even if all of them were filled with water at the same time.
Building a Custom, Modular and Robust Planter with tinktube
Given the challenges and the rather complex nature of the project, the peculiarities of the structure designed by the team were numerous. Among the most interesting details about this ambitious project:
- The creators made sure they wouldb be able to increase or decrease the space between the plants and the lighting system in order to adjust the structure to the type of crop for which it is used (some plants growing higher than others).
- Because DELL lights degrade over time providing lower performance month to month, they also wanted to be able to bring the plants closer to the light bands, following the degradation of the lights.
- To make sure they optimized the space, they designed the container structures making sure they could add an additional aisle of shelving once the basic system was proven.
The CRIFA Team’s Tips
Since several team members were unfamiliar with tinktube before putting the project together, some twists and turns happened along the way – nothing too serious, luckily!
Renaud-Pierre notably mentions the “two-inch rule”, one of the most important concepts to know when starting with tinktube. Because they ignored the rule, they ended up with unexpected extra length being added to the shelves.

The team members therefore had two solutions: cut the tubes shorter (which meant they’d have to unassemble the structure and put it back together again), or adapt the surfaces to solve the problem differently (they chose option # 2).
If you want to know the 4 steps to get started with tinktube -including the 2 inch rule-, it’s here!
Again according to Renaud-Pierre, the last major challenge encountered was more about not having the final vision of the project in mind before starting the assembly. This detail meant that the team had to dismantle some connectors in order to assemble others at some point, given the modular characteristic of the project, all the pieces are interdependent: you have to respect a certain order in the assembly so that everything fits together well!


