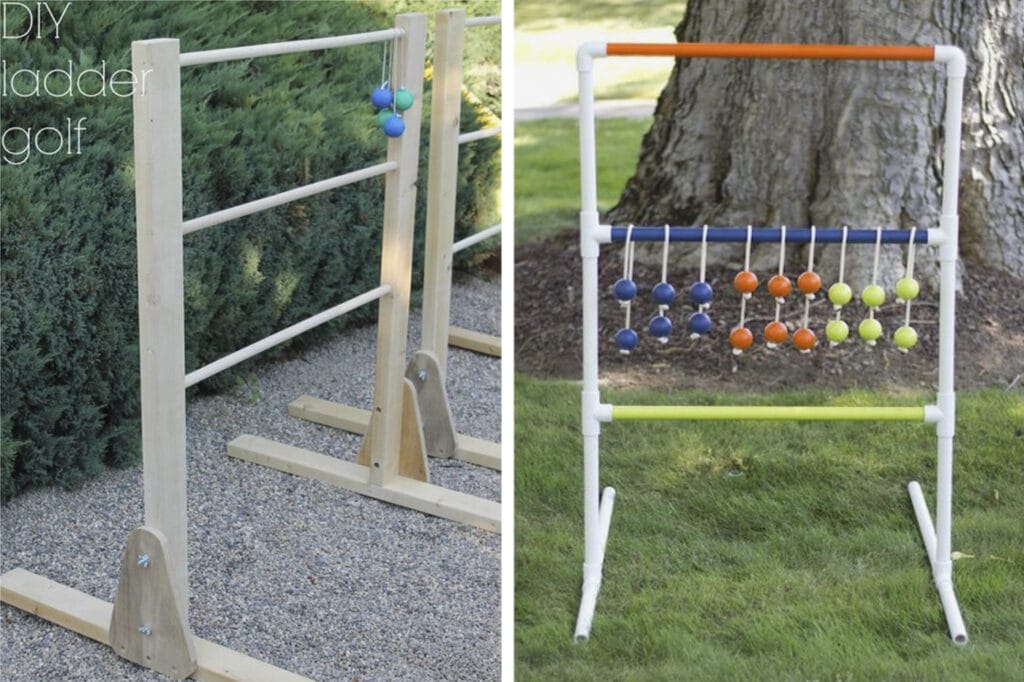
If you’re looking for a fun outdoor activity that combines creativity, craftsmanship, and a touch of competitive spirit, then we have just the thing for you. Your very own DIY ladder ball game is easy to build using tinktube’s versatile construction system! We’re providing a free plan to guide you through the entire process. We’ll walk you through the step-by-step instructions, so whether you’re hosting a backyard barbecue, planning a family game night, or simply seeking a new way to challenge your friends, this game will be your new DIY success story!
- First things first, we’ll help you gather all the necessary parts. From connectors to pipes, we’ll ensure you have everything you need to bring your ladder ball game to life. No need to worry about searching high and low for materials – we’ve got you covered.
- Once you have all the components in hand, we’ll move on to the cut list. Don’t let the thought of measuring and cutting steel pipes intimidate you. Our detailed instructions will make the process much easier than you may think, allowing you to handle the task like a pro.
- With the pieces prepared, it will be time to assemble your game. Using tinktube’s clever design, you’ll be able to do it easily. Just follow our step-by-step guidance, and you’ll be amazed at your handiwork!
- The final step is as simple as it gets: it revolves around the excitement you’ll get as you and your friends gather around, competing to toss the bolos onto the rungs of the ladders!
Now, put on your game face and let’s tackle this DIY ladder ball project together. Get ready to elevate your outdoor entertainment and create memories that will last a lifetime. Let the games begin!
1. The parts you’ll need to build your DIY ladder ball plan
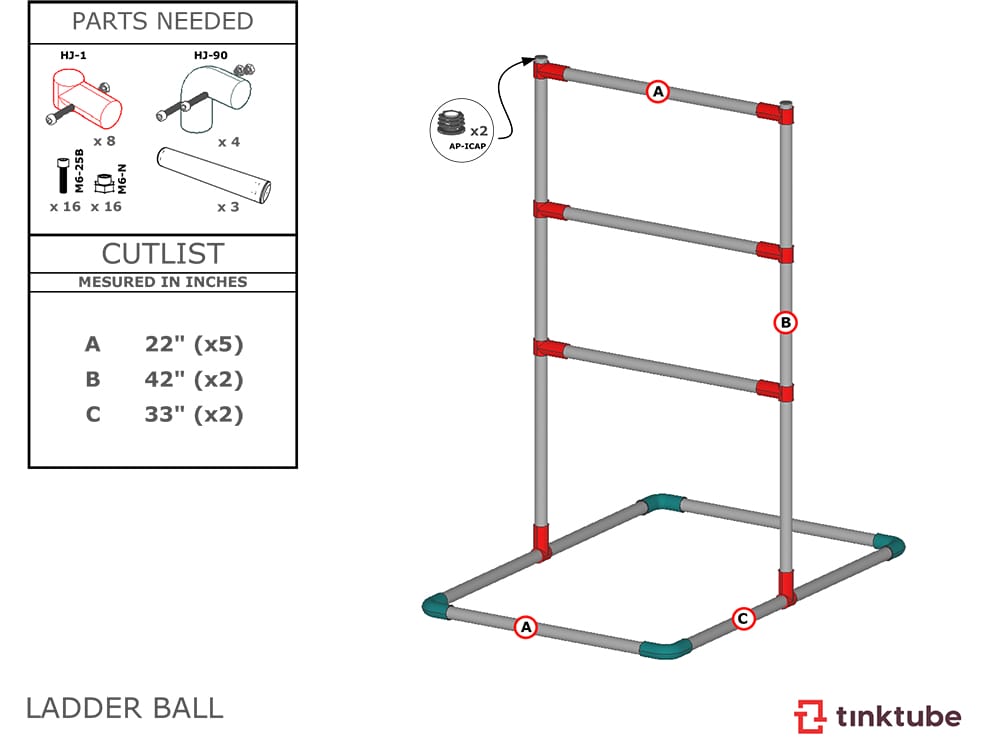
The first step is indeed gathering the parts: you’ll find a list of all the essential components you need in the table below. Here’s our piece of advice at this point: before ordering the parts, make sure to adapt the plans according to your own version of the project. Will your DIY ladder ball game be the exact same size as the one presented in this plan, or will you create something a little bit bigger? Once you’ve modified the original plans, you can go over this list and validate which parts and the number of tubes you’ll actually need. You can use the measurements presented in section 3 for reference and change the parts according to your own design!
| Qty. | Part | SKU | Link |
|---|---|---|---|
| 3 | 1-1/16" x 92" Galvanized steel pipe | PT-92-GV | Buy now |
| 8 | Modular & Structural T Connector | HJ-1 | Buy now |
| 4 | 90° Elbow Pipe Connector | HJ-90 | Buy now |
Once you’ve gathered all the parts, you’re well on your way to creating your ladder game. With the right components in hand, you’re now ready to move on to the next step of our free plan: creating the cut list.
2. The cut list
Will all the necessary materials in hand, it’s time to dive into the next exciting step: creating a cut list. With our detailed instructions, you don’t have to worry about a thing. Measuring and cutting those steel pipes will be easy! To make your life easier, use the cut list below to recreate the project. If you’ve chosen to customize the project, adjust the cut list according to your own dimensions.
| Qty. | Length (inch) | Length (centimeter) |
|---|---|---|
| 5 | 22″ | 55.88 cm |
| 2 | 42″ | 106.68 cm |
| 2 | 33″ | 83.82 cm |
The tools you’ll need:
Before you start, make sure you have the right tools for the job. For cutting steel pipes, a pipe cutter will work very well (if you don’t already have one, get it from our shop here. You’ll need it to cut the pipes, and you’ll be able to use it again on your next tinktube projects). The tinktube joint sets are assembled with bolts that require the following tools:
| Tool name | Number | Link |
|---|---|---|
| Hex drill bit set (x5) | T-BIT | Buy now |
| T handle wrench | T-HANDLE | Buy now |
Remember, precision is key when creating your cut list. Measure twice, cut once! With your accurately cut steel pipes in hand, you’re now ready to move on to the assembling part of our free plan.
3. Use this DIY ladder ball plan to build (the fun part)!
Now that all the pipes are cut and you’ve gathered all the connectors, you’re ready to start building your ladder ball game project. Use the colour codes to place all the right connectors with the tubes in the right places. Lay out your components: Before you start assembling, take a moment to lay out all your tinktube parts. Familiarize yourself with the different types of connectors and pipes you have. This will help you visualize the structure and ensure you have everything you need before diving into the assembly process!

Double-check and adjust:
After completing the initial assembly, take a step back and inspect your build. Check for any wobbling or unstable connections. Make any necessary adjustments to ensure a sturdy structure. It’s better to catch and fix any issues now than later!
4. Take charge of your Outdoor entertainment and create lasting memories!
You’re done building your DIY ladder ball game and you can now start inviting your friends over to compete, laugh and have fun! To see more inspirations about backyard DYI projects, check out the posts below. We hope you’ve enjoyed this content and had a blast building with tinktube! Send us pictures of your project at [email protected] and we’ll give you a 10% promo code for your next order!
Arbor made by Ian
Ian built an arbor for his frontyard path.


