You’ve just arrived in a place where the intersection of creativity and affordability leads to the creation of your very own green haven. At tinktube, we are ardent advocates for the DIY spirit, firmly believing that every enthusiast should be able to nurture their personal DIY mini greenhouse without incurring exorbitant costs.
The benefits of embarking on a DIY venture extend far beyond the mere construction of a mini greenhouse. Picture a space where the vibrant hues of your favorite plants converge with the soothing presence of nature, creating an environment that goes beyond aesthetics. Whether you wield the seasoned tools of a DIY veteran or are just dipping your toes into the waters of green-thumb craftsmanship, our plans are meticulously designed to cater to all skill levels. Embrace the art of constructing a haven for your cherished plants, where ingenuity and resourcefulness become your guiding principles.
As we guide you through the comprehensive steps of building your mini greenhouse, we invite you to discover the numerous benefits that extend to your well-being and lifestyle. Get ready to witness the magic unfold as you transform your space into a flourishing testament to your love for plants and commitment to a greener, more fulfilling lifestyle!
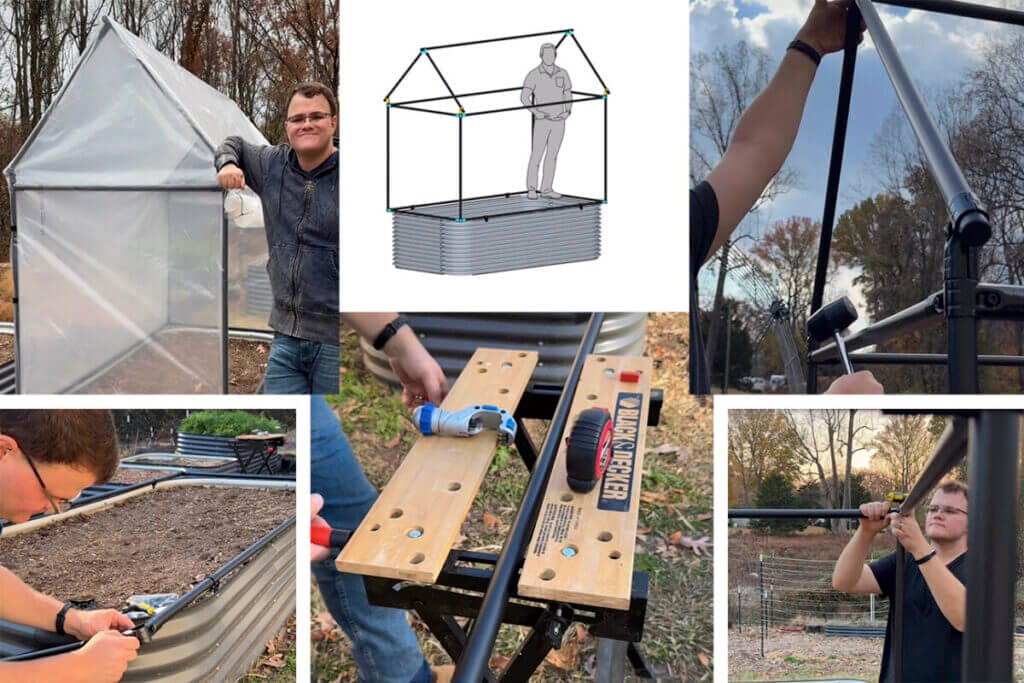
The project behind this plan
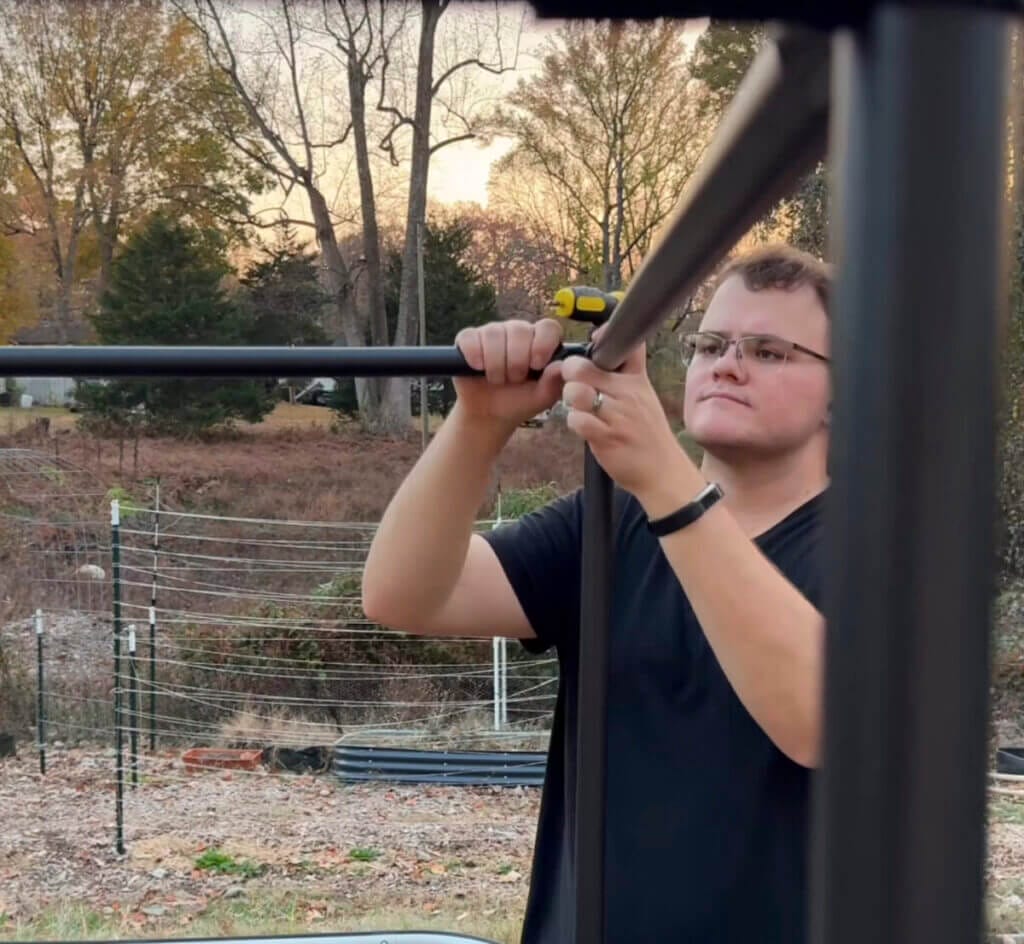
Joshua is a DIYer and a gardening enthusiast who built a raised bed greenhouse using tinktube. He posted a video on The garden is growing‘s account and it got us thinking… We needed a free plan to make it easier for other DIYers like him to create similar projects!
1. The parts and tools you’ll need to build your raised bed greenhouse
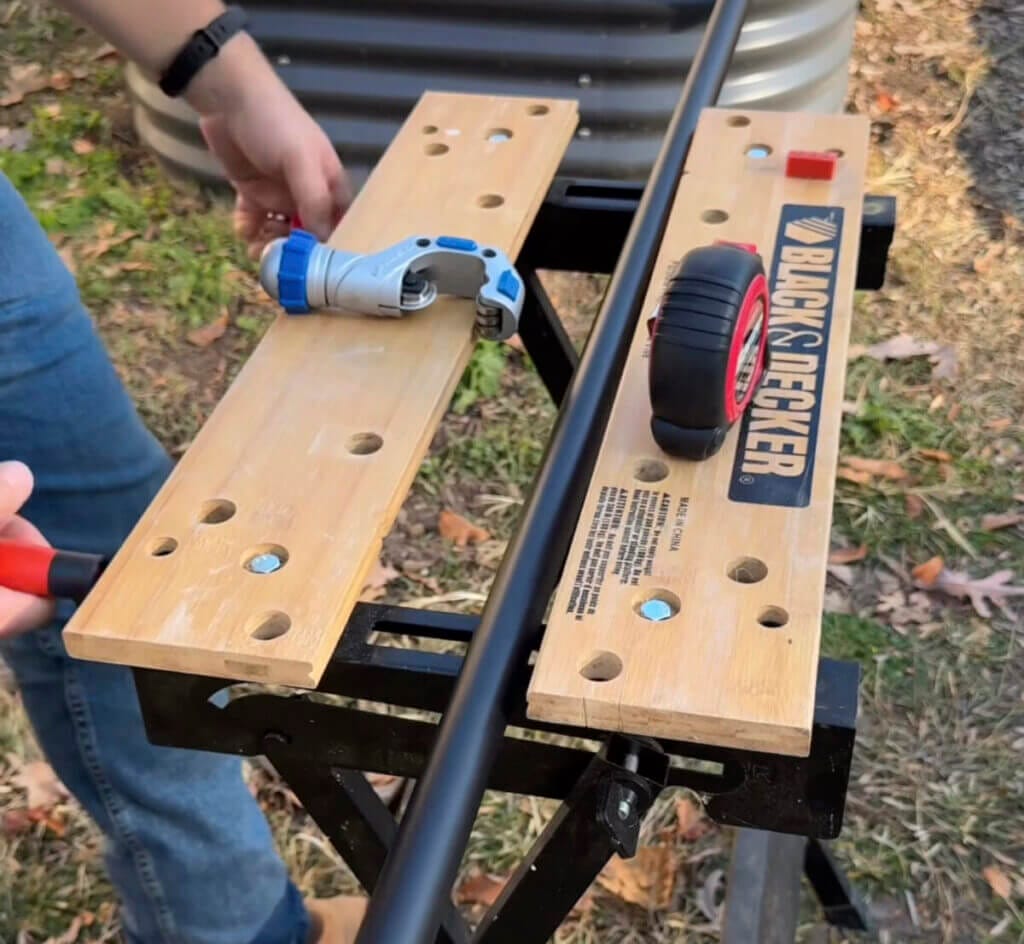
This is the part where we walk you through the essential components required for this project, ensuring that you have a clear shopping list before you start. No more wandering around hardware stores, feeling lost amidst a sea of options.
The exact number and length of the tubes will depend on the dimensions of your own frost protection greenhouse and its size. Feel free to adjust the list as necessary!
Just remember, if you change the dimensions, you should will also have to adjust the number of pipes you buy to ensure you have enough tubes to create your project. We recommend having a few extra on hand for any unexpected changes or adjustments during assembly!
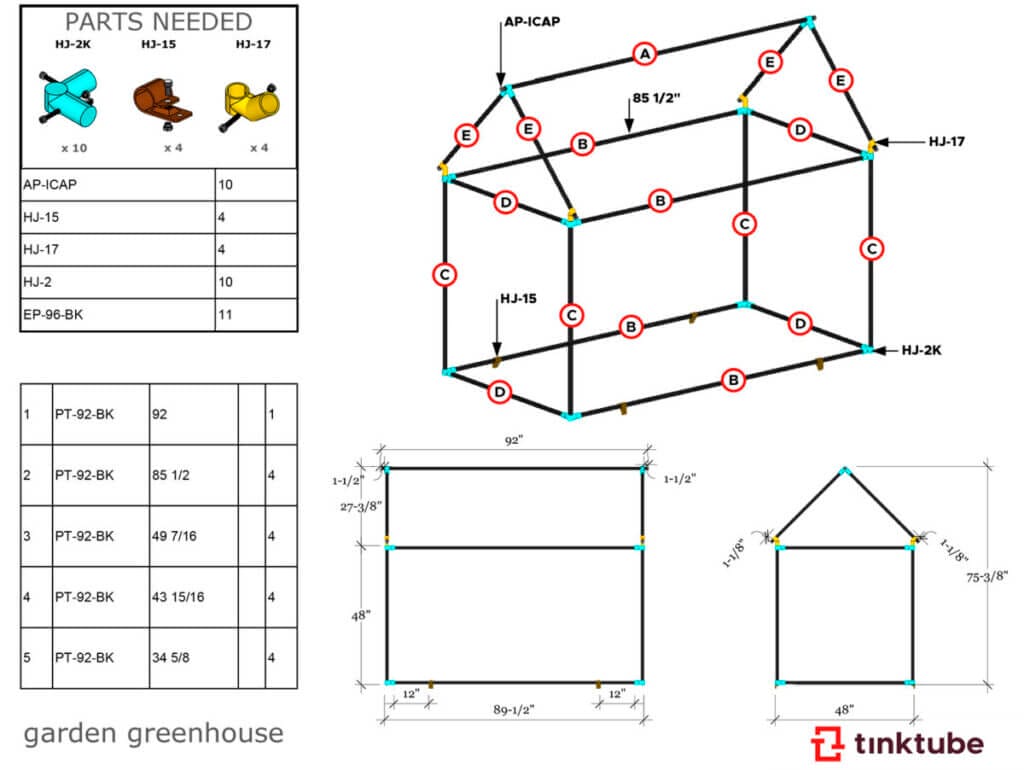
| Qty. | Part | SKU | Link |
|---|---|---|---|
| 11 | 1-1/16" x 92" Jet black steel pipe | PT-92-BK | Buy now |
| 4 | 45° Fix angle black connector set | HJ-17 | Buy now |
| 10 | Plastic Pipe End Cap | AP-ICAP | Buy now |
| 4 | Flat Offset Pipe Clamp Black Set | HJ-15 | Buy now |
| 10 | 90 Degree Corner Pipe Connector | HJ-2K | Buy now |
The tools you’ll need:
Before you start, make sure you have the right tools for the job. These are listed below:
| Tool name | Number | Link |
|---|---|---|
| T handle wrench | T-HANDLE | Buy now |
| Pipe cutter | T-CUTTER | Buy now |
Once you’ve gathered all the parts and tools, you’re well on your way to creating your DIY mini greenhouse project. When your components arrive at your doorstep, you’ll be ready to move on to the next step of our free plan: creating the cut list.
2. The cut list for your tinktube DIY mini greenhouse creation
It’s now time to plunge into the upcoming thrilling phase: this very precise cut list to prepare your tubes.
| Qty. | Length (inch) | Length (centimeter) |
|---|---|---|
| 10 | 92″ | 233.68 cm |
| 4 | 85 1/2″ | 225.58 cm |
| 4 | 49 7/16″ | 199.55 cm |
| 4 | 43 15/16″ | 174.31 cm |
| 4 | 34 5/8″ | 105.57 cm |
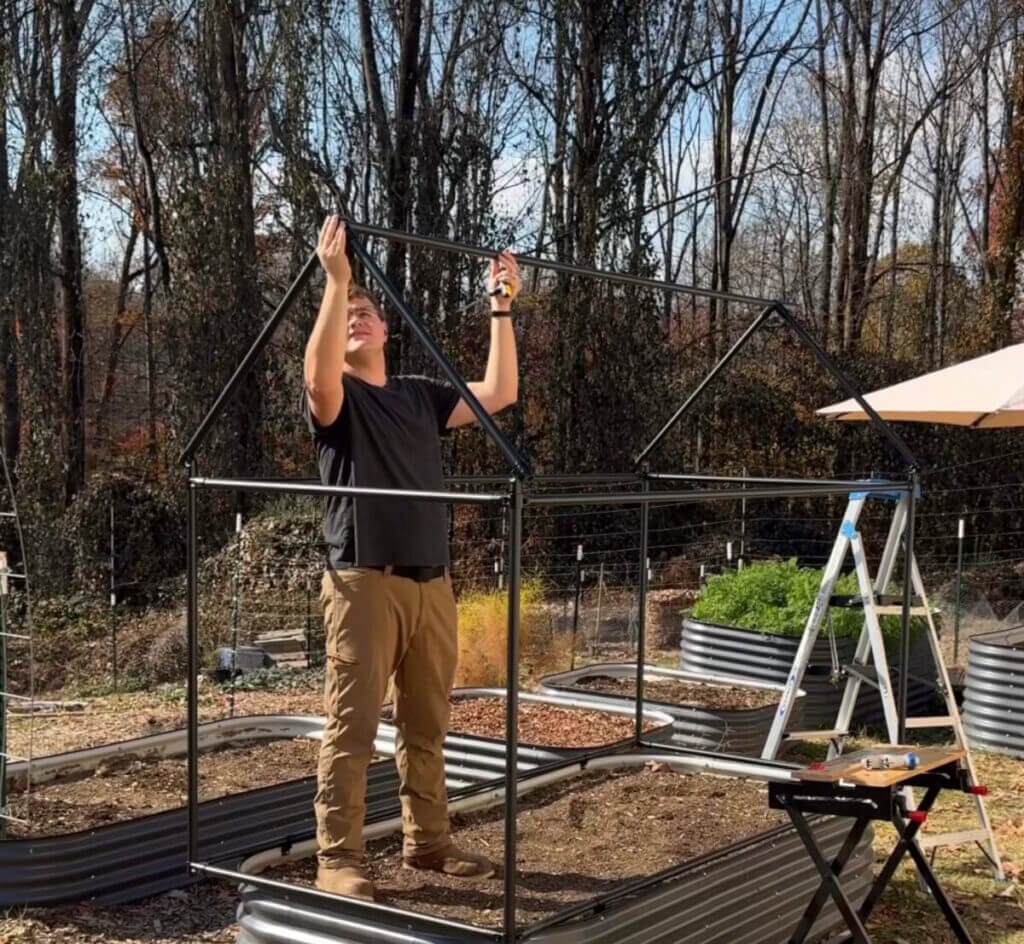
3. Use the plan below to build your project (the fun part)!
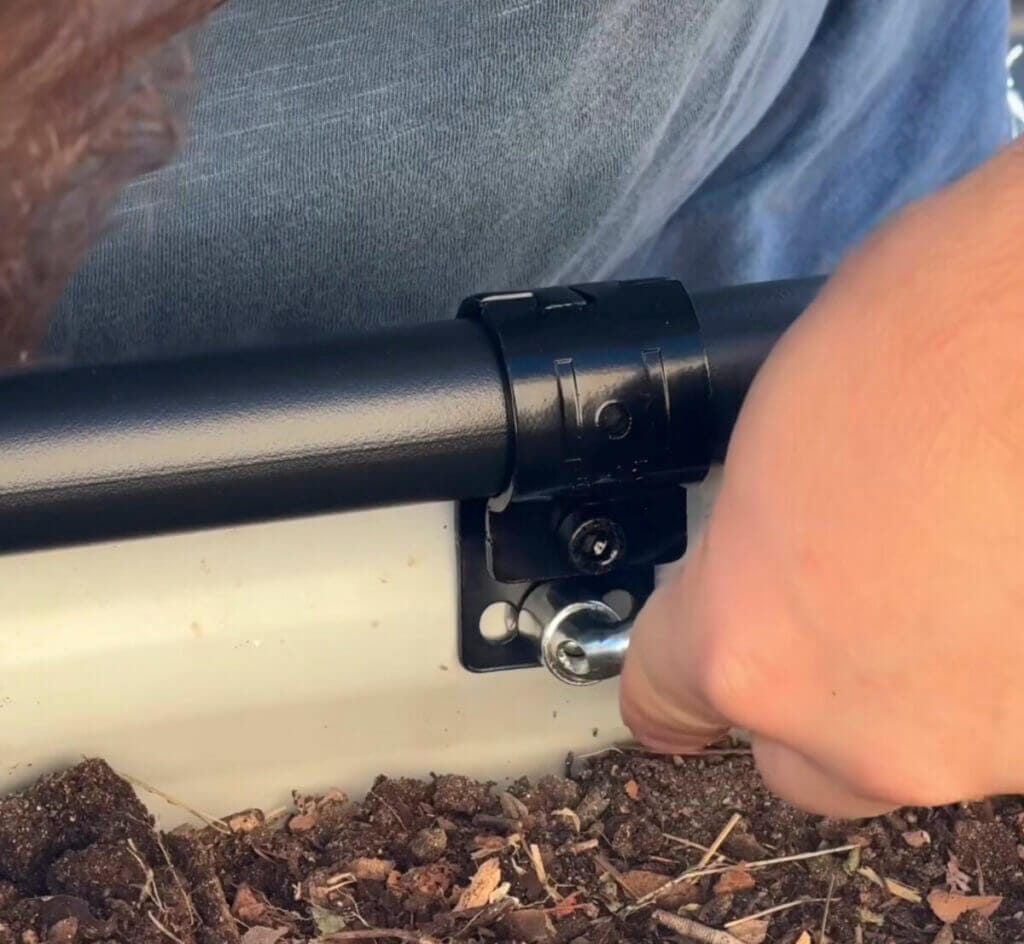
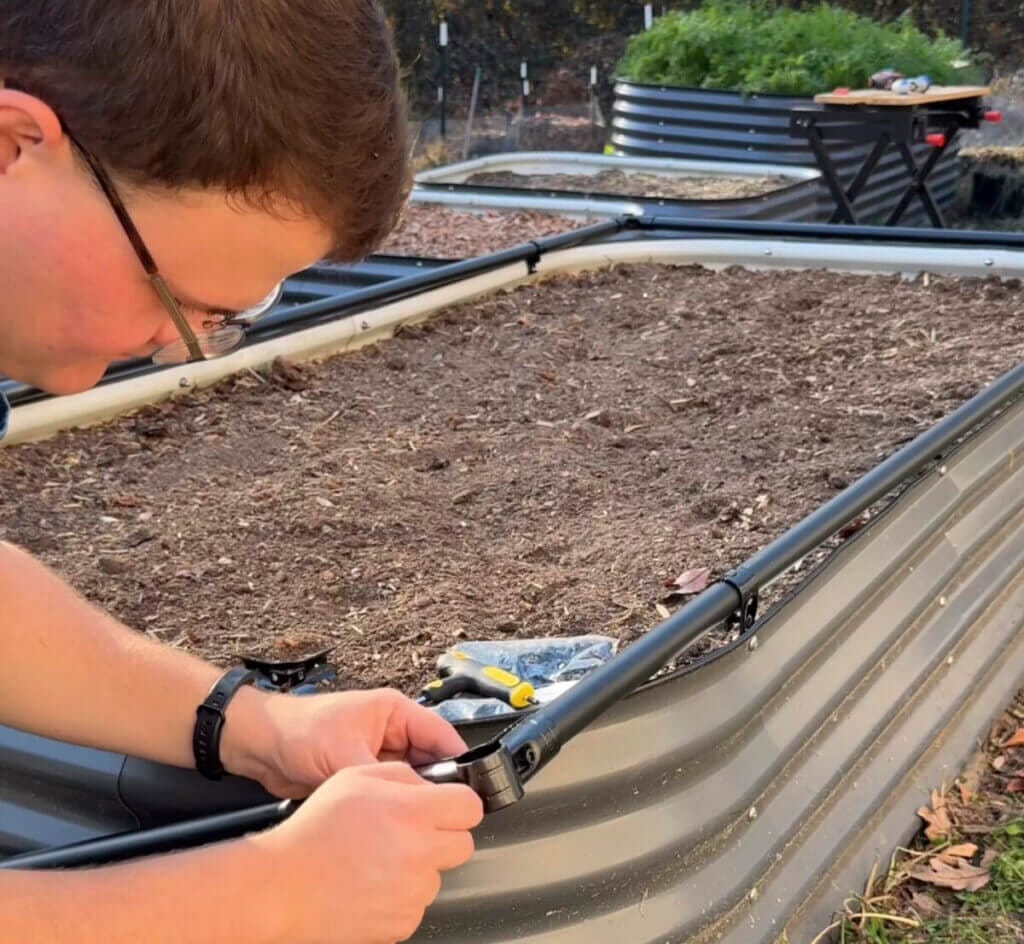
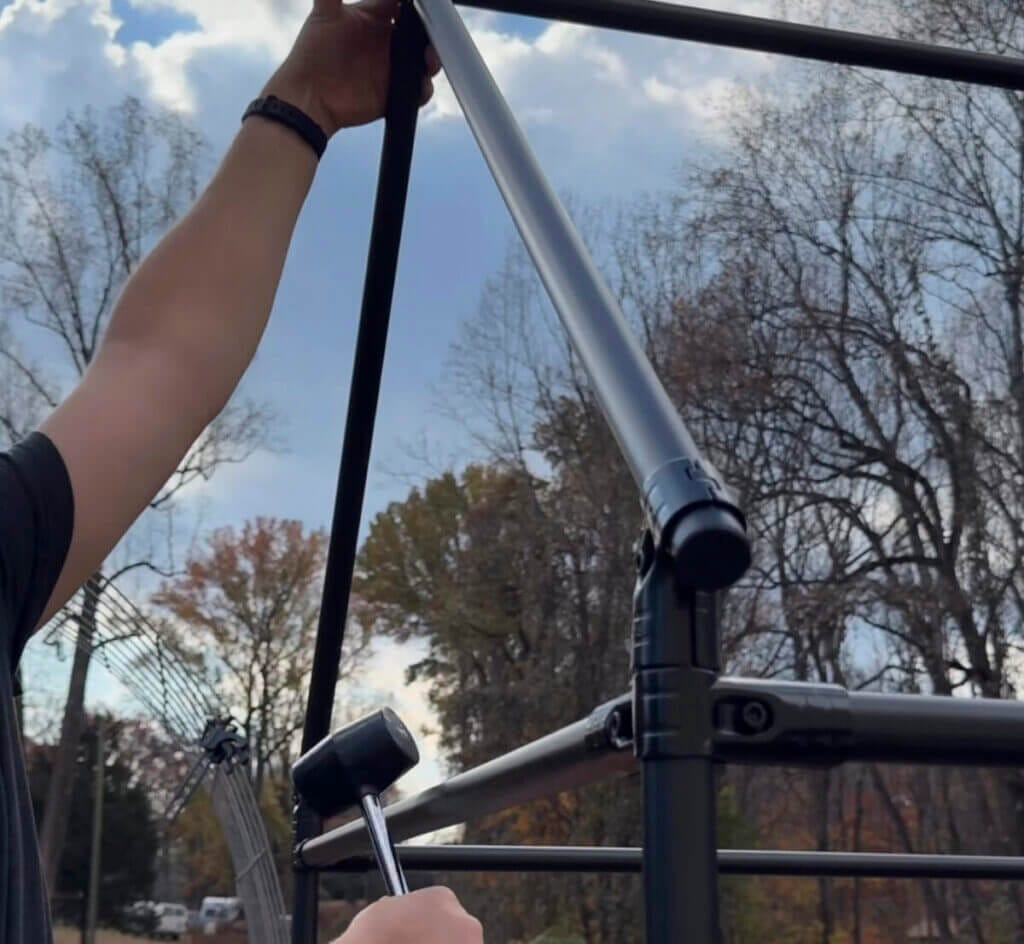
You know you’re ready to start building your DIY mini greenhouse when all the pipes are cut and you’ve gathered all the connectors in one place. Use the plan below to place all the right connectors with the tubes in the right places.
Pro tip: Lay out and organize your components before you start assembling and take a moment to familiarize yourself with the different types of connectors and pipes you have. This will help you visualize the whole structure and ensure you have everything you need before diving into the assembly process!
Double-check and adjust:
After completing the assembly, inspect your build. Check for any wobbling or unstable connections. Make any necessary adjustments to ensure a sturdy structure. It’s better to catch and fix any issues now than later!
Remember, this is a DIY project: feel free to make adjustments according to your specific dimensions and requirements. Building a DIY mini greenhouse should be a customizable experience, so don’t be afraid to adapt the materials and quantities to your vision.
4. Let your eco-friendly mini greenhouse do its job!
We hope that you found immense satisfaction and inspiration in this free plan. As you stand on the threshold of your completed project, we encourage you to embark on your gardening journey with boundless enthusiasm. Your DIY efforts will not only add a touch of greenery to your surroundings but also represents a tangible manifestation of your dedication to cultivating a space that reflects your passion for nature.
Psssst: if you’re feeling particularly proud of your garden bed greenhouse (as you should be!), please share it with us: we absolutely love seeing the incredible projects our community creates. Send us pictures at [email protected], and as a token of our appreciation, we’ll send you a 10% promo code for your next order. It’s a small way for us to say thank you for being a part of the tinktube family and for embracing the spirit of DIY!

Arbor made by Ian
Ian built an arbor for his frontyard path.

Metal or Wood: The Ultimate Showdown of Materials for DIY Railings

DIY Portable Duck Blinds: Quacking Your Way to Hunting

DIY Gate Plans: Fence Gate for Gardens and Backyards

Cover frame by Thomas
